If desired you can divide the arc or circle into segments as follows.
Revit 2017 manually draw roof.
The easiest one is the footprint roof.
Then draw the arrow to define the slope direction.
If you try to add a roof on the lowest level a dialog prompts you to move it to a higher level.
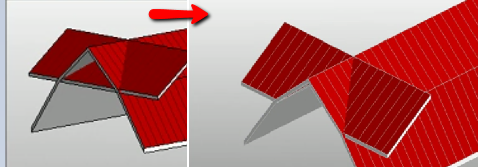
Revit 2017 roofs by footprint and joining complicated roofs.
The revit ifc manual this document is intended to serve as a guide for revit users handling ifc data and providing a better understanding of the settings available in revit discussing the way they can influence the quality and the content of the ifc file.
Learn to create roofs by footprint join complex roof in revit 2017.
Once it is completed it produces the 3d form easily finished with any.
If you specify zero segments the default a conical roof is created.
Click architecture tabbuild panelroof drop down roof by footprint.
In the drawing area select the arc line.
There are different methods in revit for creating roofs.
Enjoy the videos and music you love upload original content and share it all with friends family and the world on youtube.
On the draw panel select a sketch or pick tool.
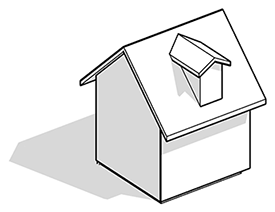
Roof 1 could also be the basis for an exterior floor deck section.
Using shape editing tools.
Create a roof by footprint creates a roof using the building footprint to define its boundaries.
Can anyone tell me the way this is typically accomplished in revit.
I would really appreciate some guidance.
The revit ifc manual therefore sets out the basics.
For creating complex roof it might be easier if you create separate roof then use join roof tool to join them later.
If you choose not to move the roof to a different level revit notifies you later if the roof is too low.
If a roof includes a slope defining arc line or circle it creates a conical roof.
The extrusion of a roof can extend in either a positive or a negative direction along the plane perpendicular to the face of a solid component such as a wall.
Just select sketchup mode and draw the shape of the roof.
A footprint roof is ideal for generating floors.
Modifying revit roof slopes to change the roof from a gable roof to hip roof go into the sketch options select all boundary lines and turn on the defines slope parameter note as a default your roof will have a slope of 30 degrees on all boundaries and form a hip roof unless you change the slope designation in the sketch mode per.
You can use height or slope value specify the method and the constraint values from properties palette.